How to read your reports
A detailed, section-by-section guide to every report — Assessment, NegoDNA, Analyzer, Forecast, Team, and the Simulator debrief — with real examples.
Every tool ends in a report, and each one is built to be acted on, not just read. This guide walks through every report the suite produces — what each section means, which numbers matter, and where to focus — with real examples throughout.
Your Assessment report
The Assessment report is your own negotiation profile — a ~9-page PDF. It opens with a one-page Executive Synthesis (a 90-second read of who you are at the table), works through your style, competencies, trust and pressure response, and closes with a personal Development Plan.
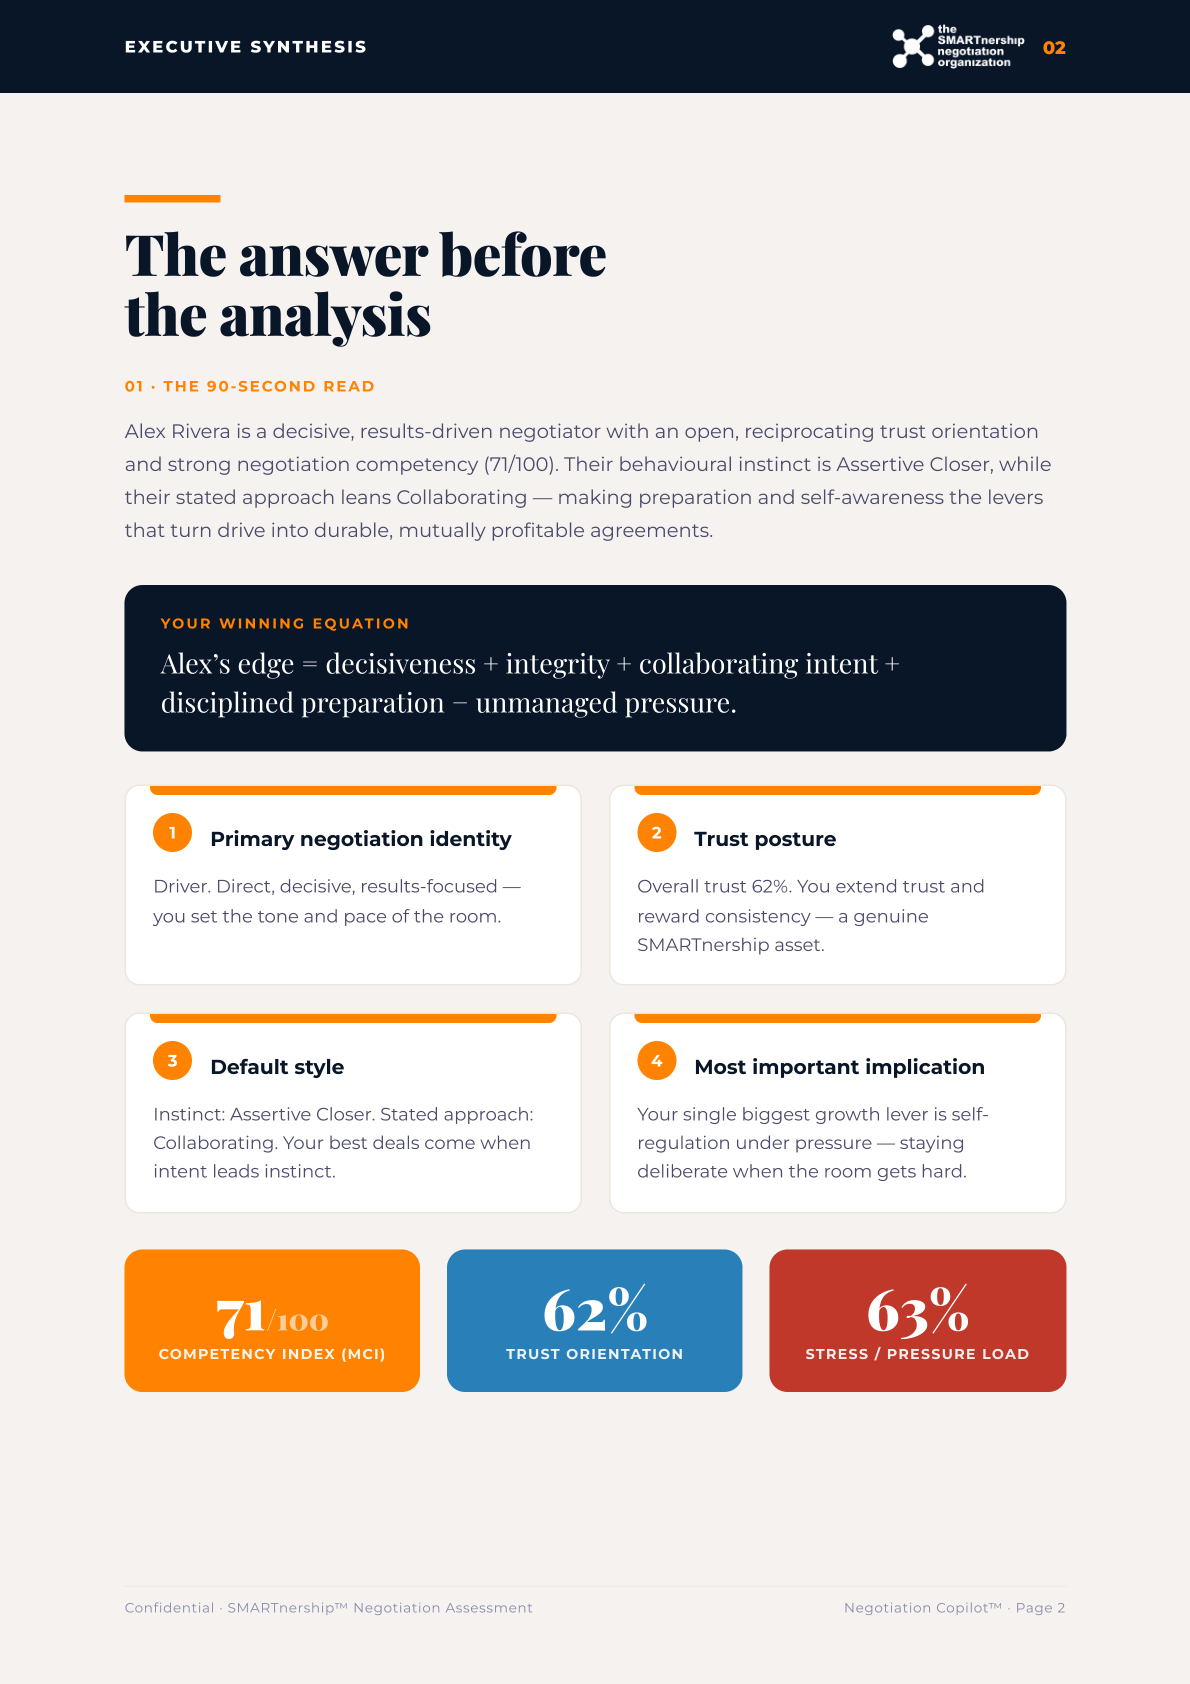
Start with the three headline tiles and the four cards on this page — they give you your identity, trust posture, default style, and single biggest growth lever in under a minute. Then read the detail:
- Behavioural style (DISC) — your dominant style (Driver, Influencer, Steady, Conscientious) and how it shifts under stress. The gap between your natural and adapted style is where surprises come from — e.g. a collaborative intent paired with a combative reflex.
- Competency Index (MCI) — a 0–100 score of overall capability, broken down by skill (prep, questioning, value-creation, listening, patience, flexibility…). Your lowest competencies are where the fastest gains are.
- Trust orientation — how readily you extend personal, societal, and institutional trust (0–100 each, plus an overall). Very low trust slows value creation; very high trust can expose you — the report flags which way you lean.
- Stress / pressure load — how much your performance degrades under pressure. A high number means your plan should prioritise self-regulation.
- Knowledge — how well you know the SMARTnership method itself, separate from how you behave.
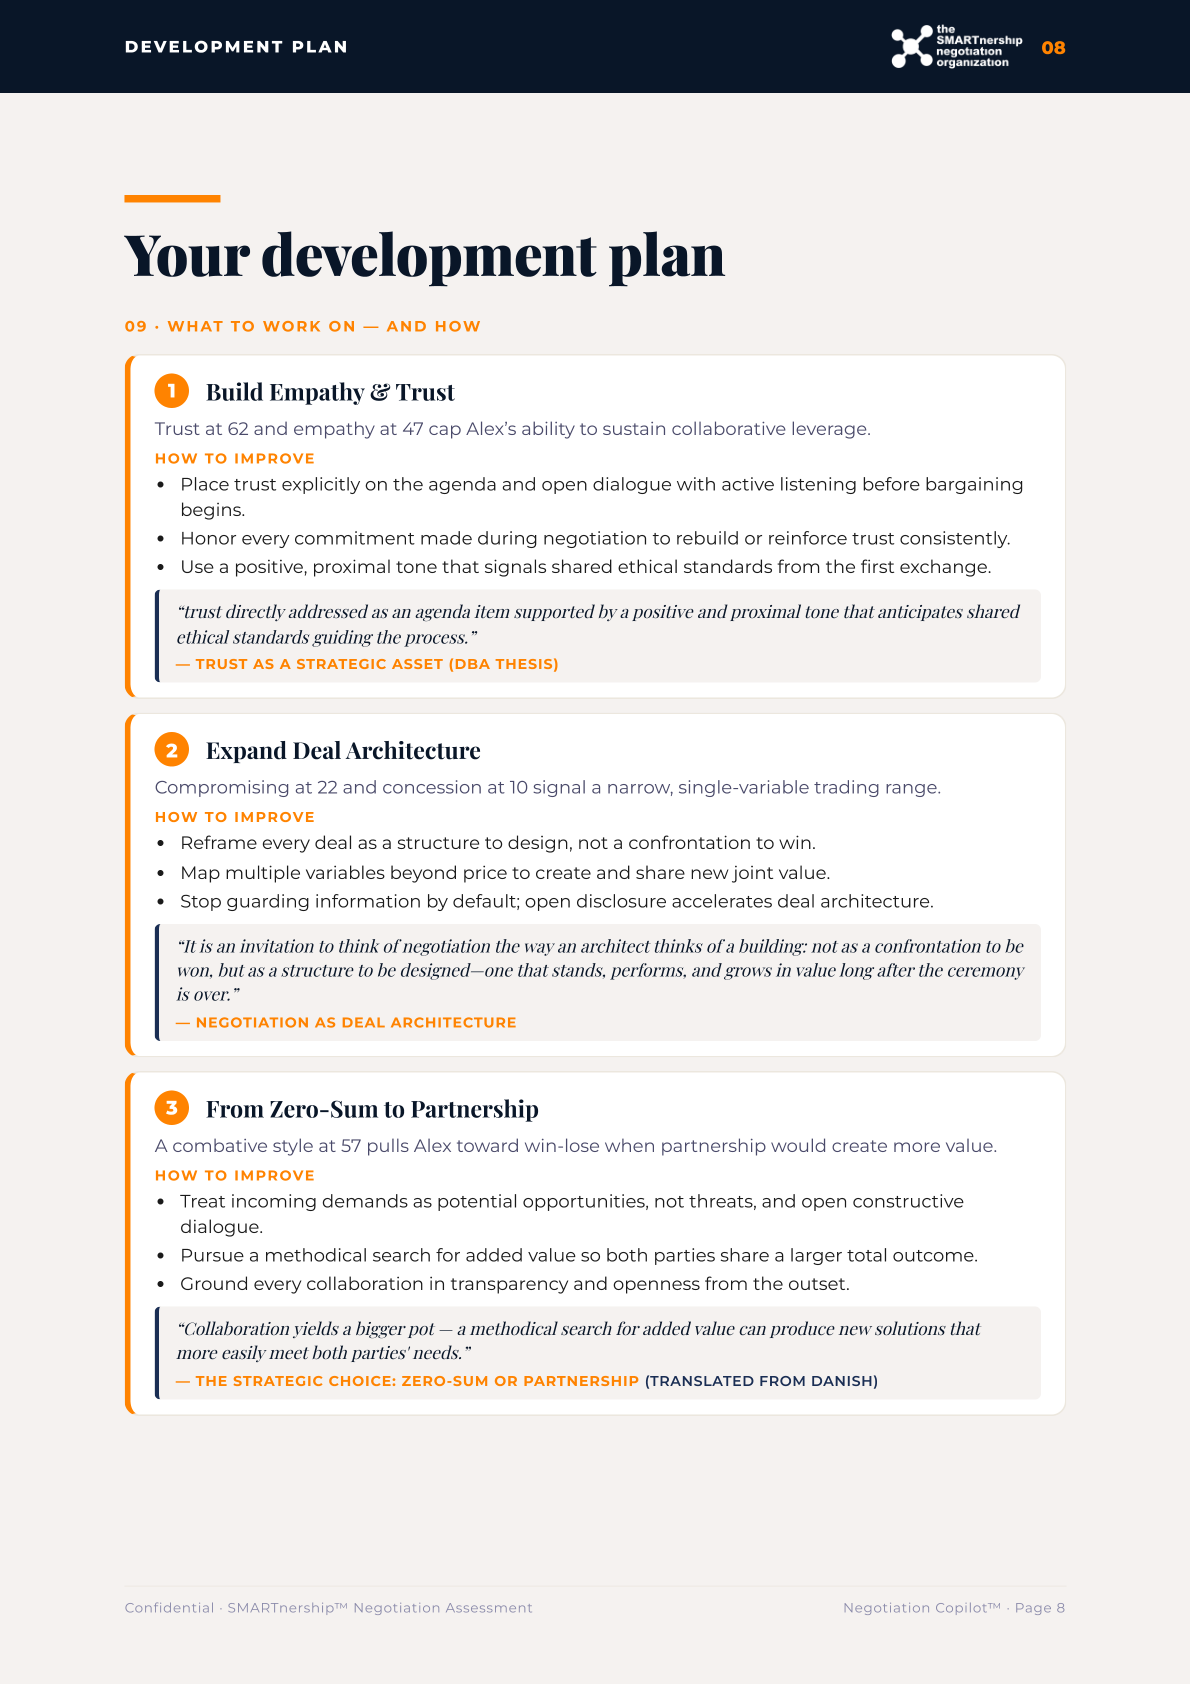
The report ends in the Development Plan — the most actionable part. It names 3–5 priorities, each with concrete steps and a short quote and source from Dr. Jensen's own books behind the advice, so you can go deeper.
Your NegoDNA (counterpart) report
NegoDNA profiles the person across the table from their public footprint. Read it as a prep brief, not a verdict — it tells you how they're likely to behave and how to adapt.
- Style & DISC signature — their likely negotiation style and behavioural pattern. This sets the tone you should meet them with.
- Strengths — what they do well. Don't try to beat them here; plan around it.
- Blind spots — where they're inconsistent, over-confident, or exposed. These are your openings.
- Tactics to expect / how to handle them — the moves they tend to use and your counter for each. This is your in-the-room checklist.
Your Analyzer (contract) report
The Analyzer turns a contract or RFP into a negotiation brief — a set of documents. Read it in this order:
- Clause risk — the clauses that carry risk (uncapped escalators, weak SLAs, missing liability caps, one-sided termination). Each is rated; work top-down from the highest risk.
- NegoEconomics variable register — every give-and-take variable in the deal and what it's worth to each side. This is your list of tradeables — trade value instead of conceding on price.
- Value at stake — the money exposed by the risky terms, so you can prioritise what to fight for.
- Playbook breaches — if you uploaded a governing playbook, exactly where the contract violates your own standards.
Your Forecast report
The Forecast predicts a live deal on two linked models: Deal Reach (will it close, on what terms, and where it breaks) and Deal Durability (will the signed deal actually hold). The report opens with the answer, and puts the working underneath.
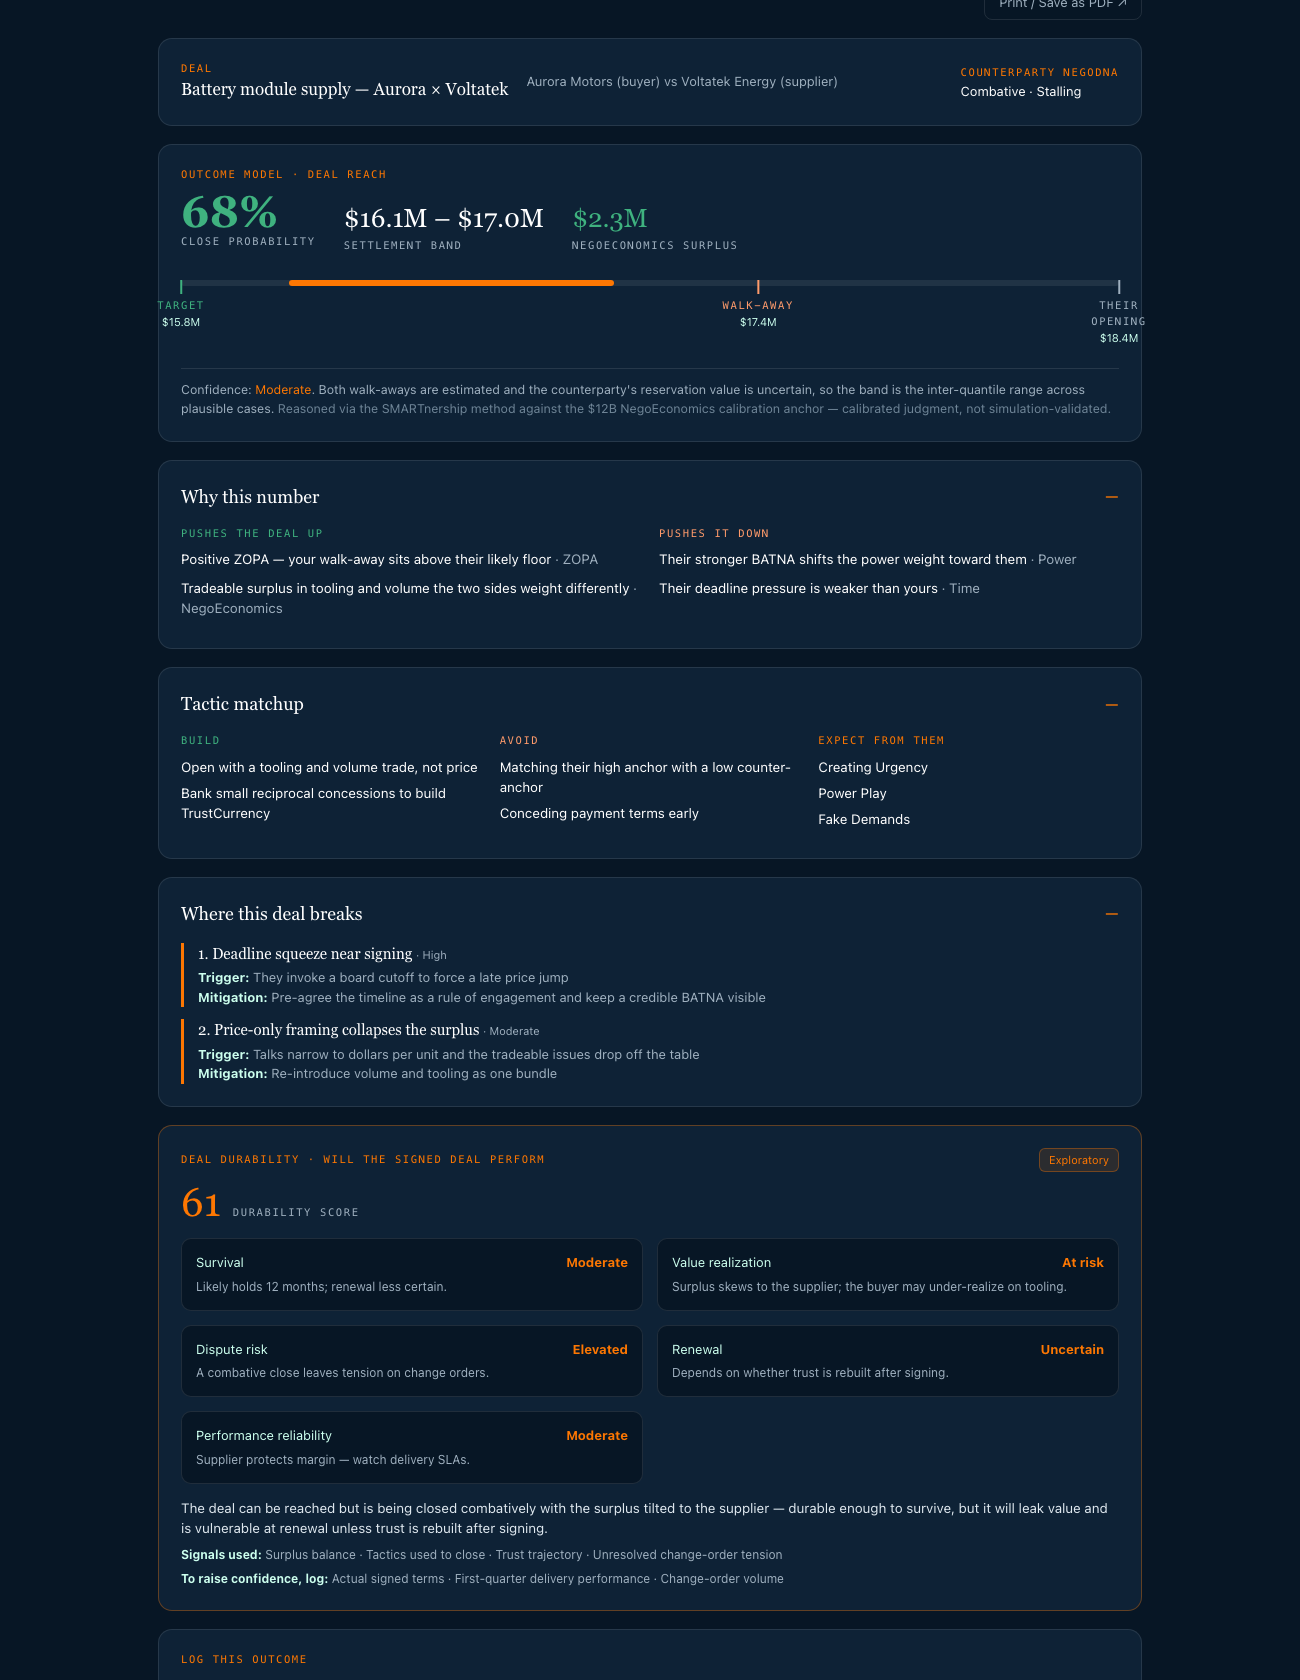
- The verdict — one sentence saying what the two forecasts mean together. "It should close — but as drafted, the value leaks after signing" is a different deal from one that closes and holds.
- Will it close? / Will it hold? — the close probability (e.g. 68%) and the durability score (e.g. 61/100), side by side, because they are one story: reach, then durability. Under each sits the biggest force for and against.
- Settlement band — the likely landing zone, with your target, your walk-away, and their opening marked on it, plus the NegoEconomics surplus still on the table.
- Do this first — your opening move, given its own panel. Play this before anyone quotes a number.
- Where this deal breaks — the specific failure points, each with a likelihood and a Do: counter-move. A risk without a counter-move is just anxiety.
- The reasoning — the drivers, the five durability sub-scores, and the tactic matchup, folded away. Open them only when you want to check the working.
Your Team report
The Team board maps your people onto the three SMARTnership roles and tells you whether you can field a complete negotiation team.
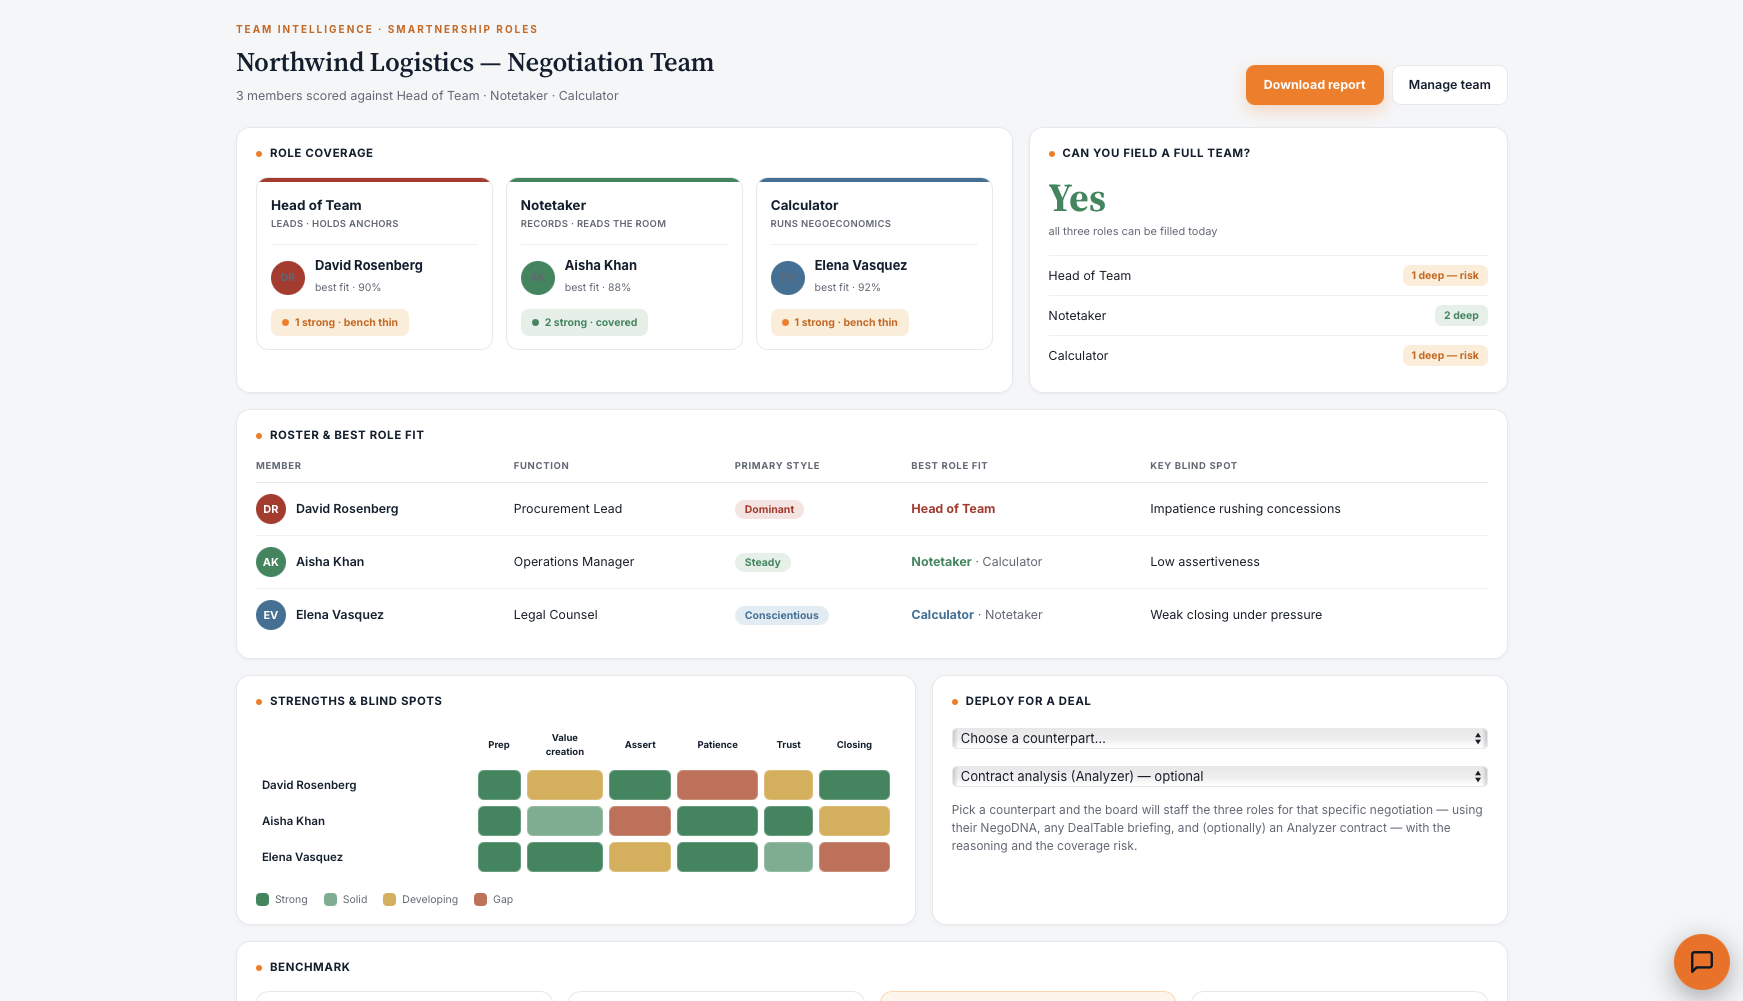
- Role coverage — the best fit for Head of Team, Notetaker, and Calculator, and whether each role is covered or bench-thin (one-deep is a risk).
- Can you field a full team? — a yes/no with the depth behind each role.
- Roster & best role fit — each person's function, primary style, best role, and key blind spot.
- Strengths & blind spots grid — the team's skills at a glance (strong / solid / developing / gap), so you see where the whole team is exposed.
- Deploy for a deal — pick a counterpart and the board staffs the three roles for that negotiation, using their NegoDNA and any Analyzer contract.
Your Simulator debrief
After a practice round, the debrief shows what worked and what to change. Take each point as one concrete adjustment to carry into the next negotiation — not a grade. Re-run the scenario to see the change land.
More on the Assessment report →